Eidos 7 modules provide early permanent investment in scanner, hacking, or combat functions at a Repair Console.
PC / Global; base game with available story content
WHERE & HOW TO FARM
Where to farm
Eidos 7, including the locked gate and tunnel on the route toward the Crater.
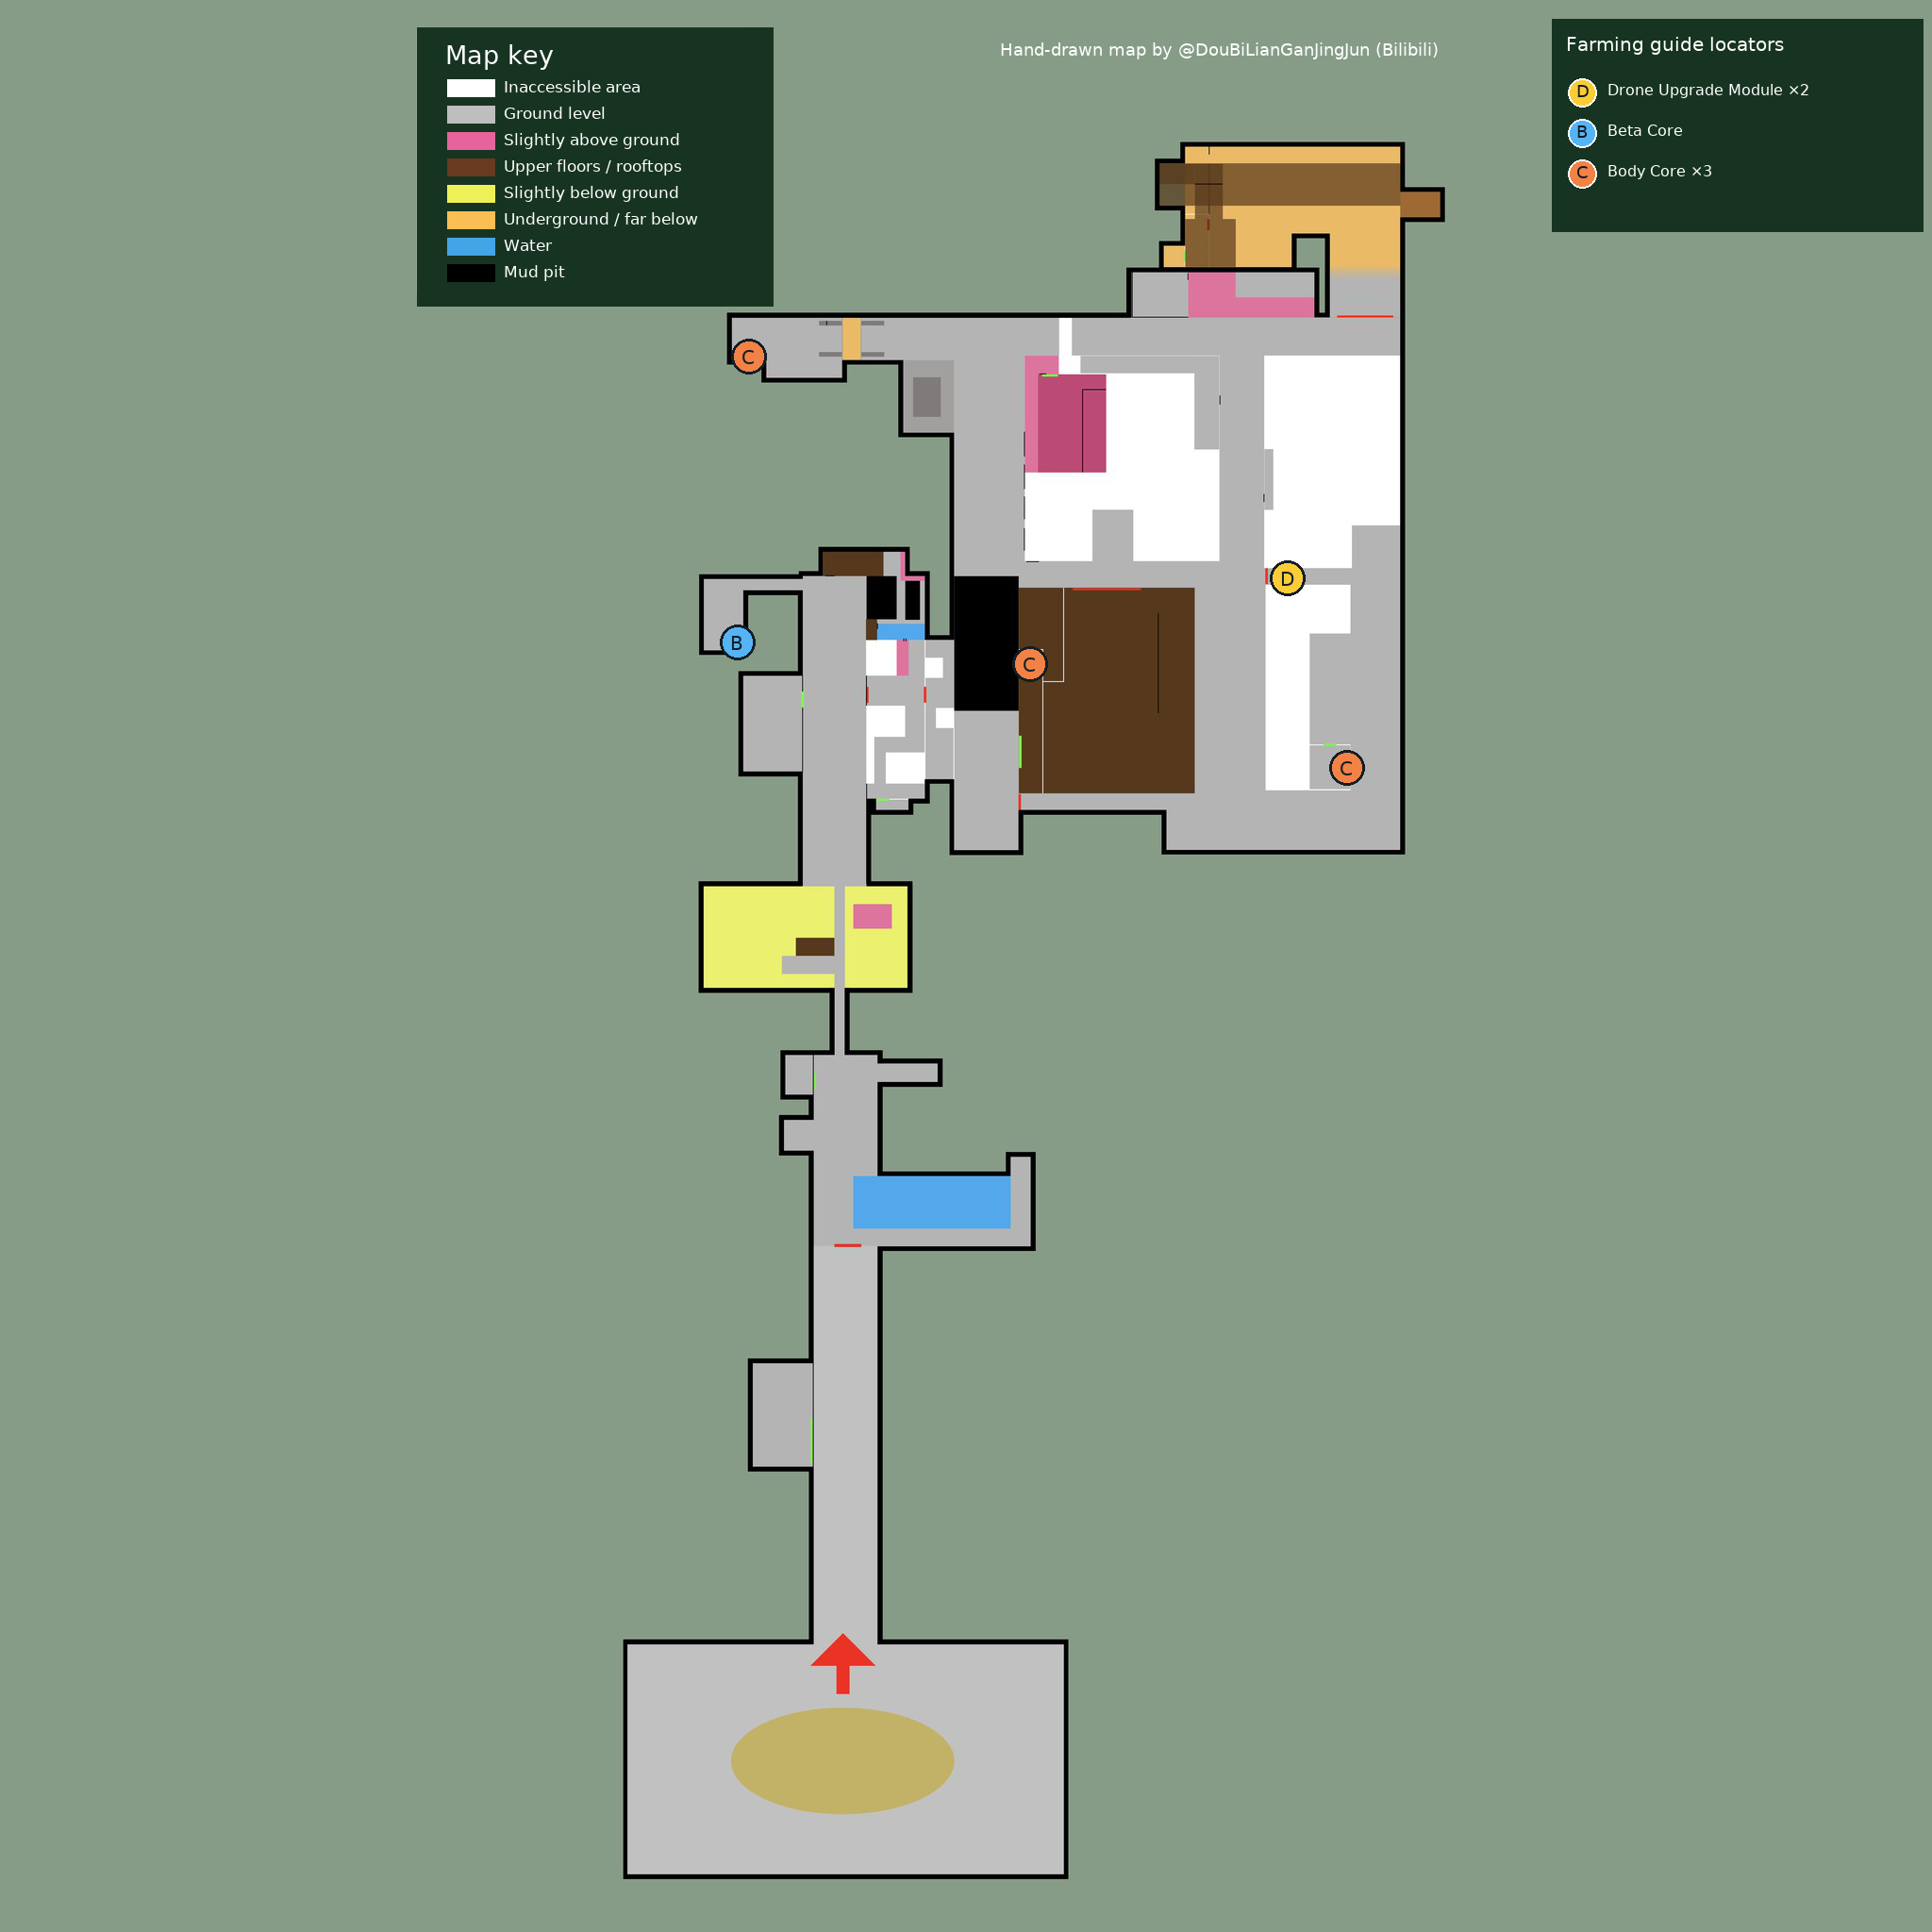
Sweep Eidos 7’s listed module sites while exploring its terraces, ledges, and locked areas. Modules are fixed pickups or rewards from small scavenger robots; they are spent at Repair Consoles and do not need to be saved for a later region, since campaign locations contain additional modules. Some opportunities require reaching a gate or the Crater approach, so treat the map markers as a checklist and return to gated entries when the route opens.
Eidos 7A industrial-area floorplan. D marks two Drone Upgrade Modules near a gate, B marks a Beta Core, and C marks three Body Core locations. The legend explains elevation and access; this map covers the industrial area only.
GET STARTED
How to farm
Before you go
Reach Eidos 7 and unlock access to its exploration routes.
Be able to reach the relevant gate, ledges, and tunnel approaches.
Have access to a Supply Camp Repair Console for spending collected modules.
Open the Eidos 7 module checklist and choose a marker near your current route.
Search terraces and ledges around the marked landmark for a ground pickup before moving on.
At the locked gate site, open the route and defeat the small enemy behind it; collect the module it drops.
On the route toward the Crater, inspect the tunnel on the right and clear the small enemy near the crates.
Check the marker off after collecting each module so a later sweep covers only unfinished sites.
Travel to a Supply Camp and open its Repair Console.
Spend modules on the branch you want, such as environment scanning, hacking, or drone combat.
Farming tips
Small scavenger robots can flee or self-destruct after being struck; engage promptly when you see one.
Prioritize hacking if you want access to high-security chests, but choose according to the obstacles you are encountering.
Repeat, collect and use
Eidos 7’s listed sites are one-time pickups or enemy rewards. Other regions and the Wasteland merchant provide additional modules; New Game+ restores collectibles.
Common mistakes
Leaving a small robot alive while exploring nearby: it may escape, so deal with it when first spotted.
Treating each module as tied to one branch: modules are spent at Repair Consoles on available drone upgrades.
Expecting every marker to be open immediately: return when its gate or story route is accessible.
When to stop or switch
Stop the Eidos 7 sweep when its checklist is clear or remaining markers are gated; spend the modules and continue collecting in another unlocked region.